From zero to hero on backporting pull requests
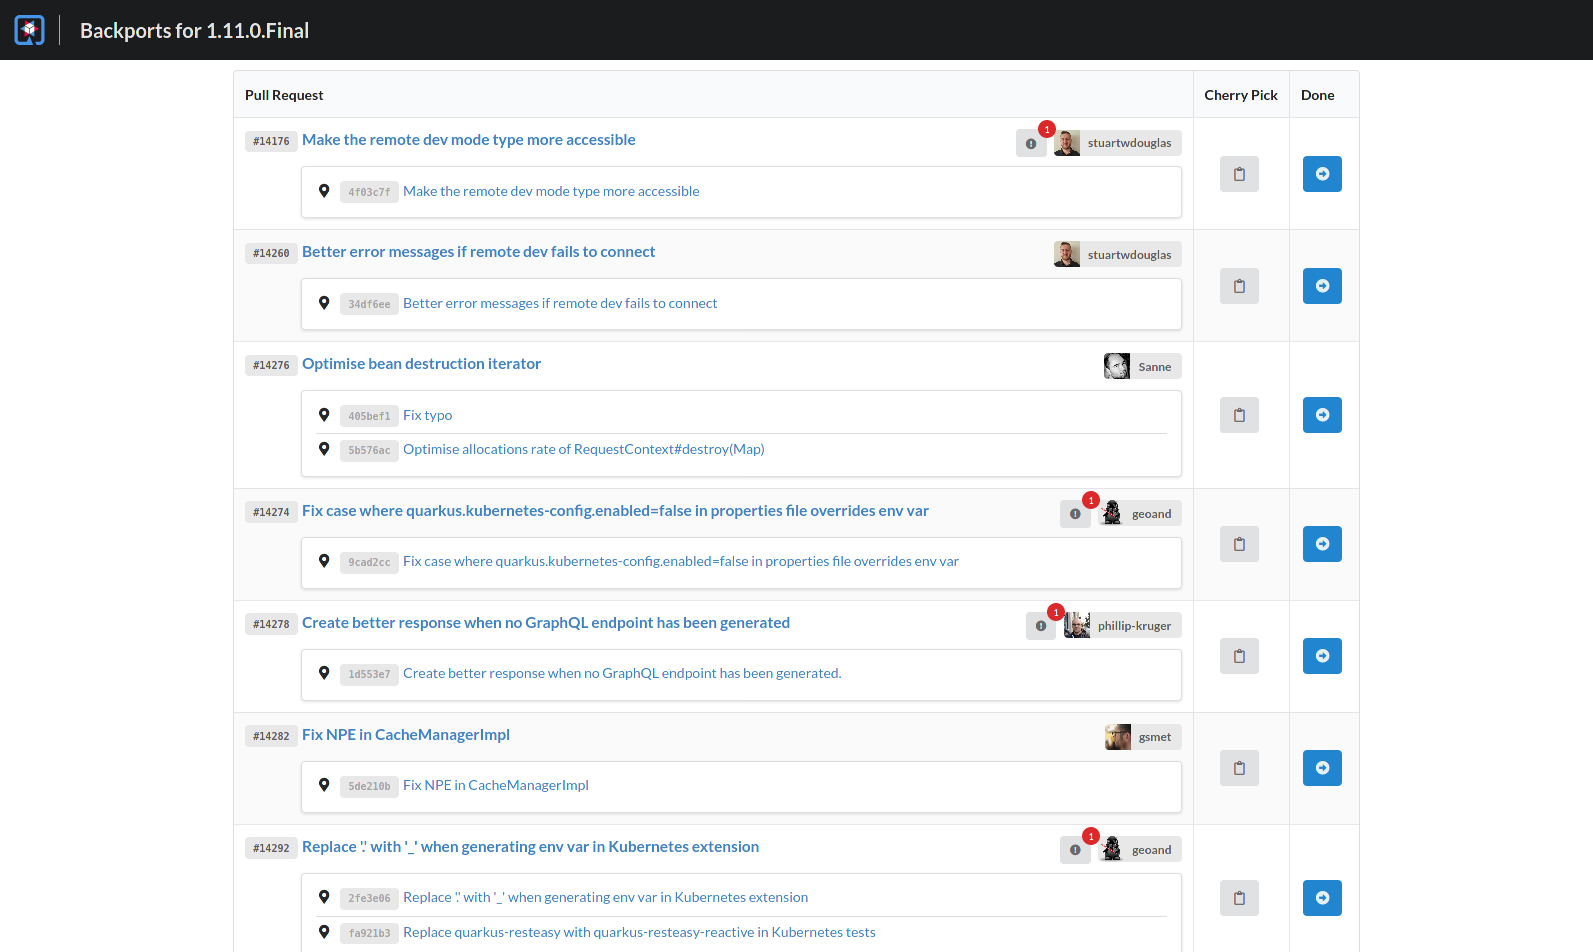
The Quarkus project moves fast and when we prepare bugfix releases, we usually have several dozens of pull requests to backport. The number of pull requests to backport is enormous and doing it via the GitHub UI is inconvenient and takes a lot of time (click PR, copy/paste commit hashes to cherry-pick, remove label, assign milestone, assign milestone to all fixed issues, next) plus some limitation of the UI (it’s not possible to sort by merge date to avoid conflicts, for example). So we decided to automate this work, and built an application. Of course, with Quarkus!
Before we dig into the solution, let me give you a quick explanation of our release process.
Release process
The Quarkus Team adopts a Major.Minor.Patch.Classifier (eg. 1.7.0.CR1,
1.7.0.Final) version pattern. Depending on the version bumped, different
processes are adopted:
Major and Minor bumps
Our main branch is always ready for the next major or minor release. This process is usually very smooth and involves no backporting.
Patch or Classifier bumps
Whenever a new patched version (or a second CR) is about to be released in
Quarkus, our Release team starts backporting commits from pull requests that
were merged in the master branch. How do they know which pull request to
grab? We have a triage/backport? label that our team add to pull requests
for features that would be worth having it in the upcoming patch release.
How do we automate that?
The application basically queries a GitHub repository’s merged pull requests
and closed issues (using the GraphQL API
exposed by GitHub) containing a certain label and changes their milestones
to one selected in the UI (and removing the certain label afterwards).
Applying the changes introduced by these pull-requests
(aka. cherry-picking) is simplified by providing a button next to each
pull-request to copy the necessary git cherry-pick commands to the
clipboard - we prefer this step to be done manually by the Release engineer.
Our experience with Quarkus
Here you can find a summary of the extensions used in the backports application:
-
ArC (CDI): Manages the services lifecycle
-
MicroProfile Config: To externalize properties
-
RESTEasy: Exposes an endpoint the UI can consume. Also serves the UI using Qute’s Type-safe templates (see Qute).
-
Qute: Used on all templates (UI and GraphQL query payload)
-
Rest Client: To invoke the GitHub’s GraphQL endpoint
-
Cache: For caching open Milestones from the GitHub’s GraphQL endpoint
-
Hibernate Validator: For validating input
-
Jackson (JSON library): To parse the result from the GitHub GraphQL endpoint
Live Coding
The live coding is a killer feature in Quarkus and provided a quick feedback
while classes and methods were changed during development. As a rule of
thumb, always use ./mvnw quarkus:dev while developing a Quarkus
application.
MicroProfile Config
Configuring which GitHub repository to use (to test or even for non-Quarkus
repositories) and the GitHub authentication token (plus a different backport
label if necessary) should be easy to configure without changing any source
code. Quarkus uses Microprofile Config, so we externalized these
properties. Quarkus also supports .env files, which we used while
testing. This made local testing easier by not requiring us to change the
application.properties directly or setting any environment or system
property before running the application.
Qute
Qute is a template engine. We used it to generate the UI and to generate GraphQL queries where simply using GraphQL variables are not enough - for example, getting issue data from a list of issue numbers. We used Type-safe templates to generate the UI and the GraphQL queries.
Rest Client
GraphQL, in a nutshell, means POSTing some JSON data to an HTTP endpoint and parsing the result as a JSON document. Simply that. The Microprofile REST Client is a good option to perform this task, so we came up with this:
javax.ws.rs.core.HttpHeaders;

import io.vertx.core.json.JsonObject; import
org.eclipse.microprofile.rest.client.inject.RegisterRestClient;

@RegisterRestClient(baseUri = "https://api.github.com/graphql")  public
interface GraphQLClient {

    @POST
    JsonObject graphql(@HeaderParam(HttpHeaders.AUTHORIZATION) String authentication, JsonObject query);
}
In the GitHubService we can now consume the GraphQLClient object:
    @Inject
    @RestClient
    GraphQLClient graphQLClient;
You can see how the client is invoked here
Thanks
This application took ~1 week to be developed (learning GraphQL included). That was made possible due to the following Quarkus team members:
-
 Guillaume Smet: For the beautiful frontend work
 -
 George Gastaldi: For having fun developing the
backend and the GraphQL integration
 -
 David Lloyd: For the crazy regular expressions
needed to extract issue numbers in commit messages.
More information
-
Quarkus Backports sources: https://github.com/quarkusio/quarkus-backports
-
Quarkus website: https://quarkus.io
-
Quarkus GitHub project: https://github.com/quarkusio/quarkus
-
Quarkus Twitter: https://twitter.com/QuarkusIO
-
Quarkus chat: https://quarkusio.zulipchat.com/
-
Quarkus mailing list: https://groups.google.com/forum/#!forum/quarkus-dev


